本文主要介绍了Synopsys仿真工具VCS的基本使用,包括如何编译与仿真,makefile文件的编写、以及代码覆盖率
编译
1.源代码
counter.sv
1
2
3
4
5
6
7
8
9
10
11
12
13
14
15
16
`timescale 1ns/1ps
module counter(
input clk,
input rst,
output logic [5:0] count
);
always @(posedge clk or negedge rst) begin
if(!rst)
count <= 0;
else
count <= count + 6'b1;
end
endmodule
2.Testbench
counter_tb.sv
1
2
3
4
5
6
7
8
9
10
11
12
13
14
15
16
17
18
19
20
21
22
23
24
25
26
27
28
29
`timescale 1ns/1ps
module counter_tb();
logic clk;
logic rst;
wire [5:0] count;
counter u1(clk, rst, count);
always #(5) begin
clk = ~clk;
end
initial begin
clk = 0;
rst = 0;
#20;
rst = 1;
#50;
if(count != 5)
$display("Failure 1: the counter should be 5 but it is %d", count);
else
$display("You gotta the right result! It is five!");
$finish;
end
endmodule
3.filelist
filelist.f:将需要编译的文件都放在这个文件夹下
1
2
./counter.sv
./counter_tb.sv
4.Makefile
将编译相关的一些指令集成在Makefile文件中
1
2
3
4
5
6
7
8
9
10
11
12
13
14
15
16
17
all: clean comp sim
sim_name = simv #recommend simv_* to rename
clean:
rm -rf ./csrc *.daidir *.log simv* *.key
comp:
vcs -full64 -cpp g++ -cc gcc -LDFLAGS -no-pie -LDFLAGS -Wl,--no-as-needed -CFLAGS -fPIE \
-sverilog +v2k -timescale=1ns/1ps \
-debug_acc+all \
-o ${sim_name} \
-l compile.log \
-f filelist.f \
sim:
./${sim_name} -l sim.log编译相关的常见指令:
-full64#以64位linux系统运行-sverilog#支持sv语法+ v2k#支持verilog2001特性-debug_acc+all#在仿真时,能使用调试功能-f filelist.f#指定包含源文件和编译时选项的路径名列表的文件-o ${sim_name}#更改编译输出文件的名称-l compile.log#输出编译日志
make comp后的结果:
make run后的结果:
make clean后的结果:
仿真
1.$vcdpluson()的使用
调用
$vcdpluson()记录仿真过程中的波形$vcdpluson()或者$vcdpluson(0, counter_tb)记录counter_tb及其所有子模块的波形
$vcdpluson(1, counter_tb)只记录counter_tb层的波形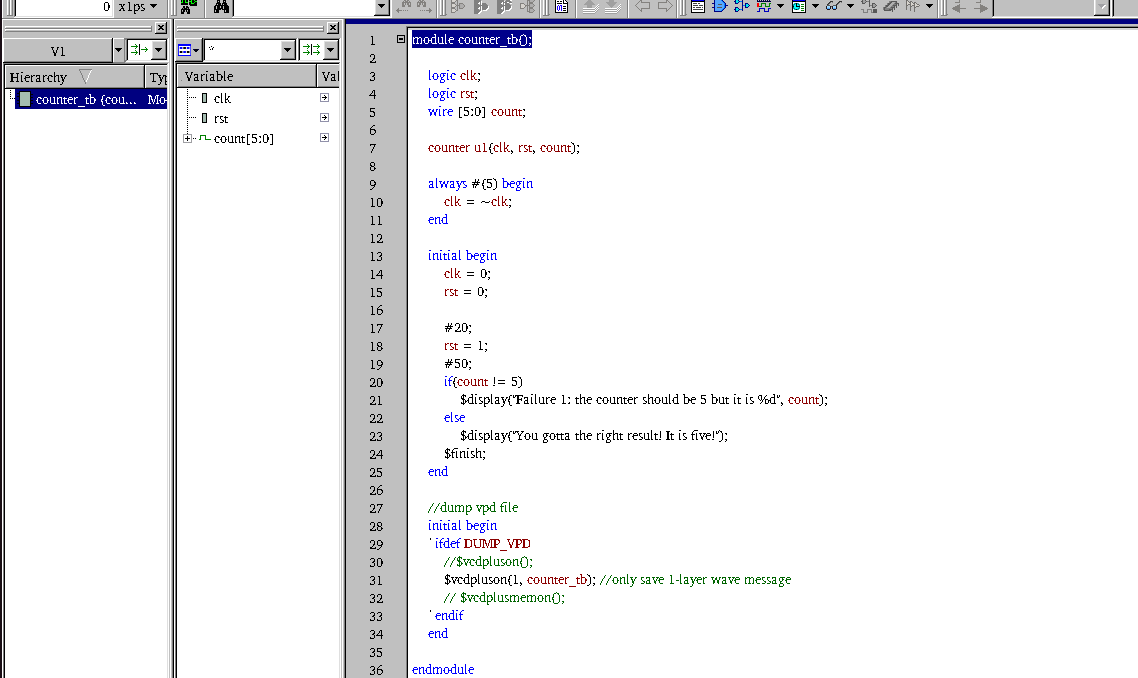
$vcdpluson(2, counter_tb)记录 counter_tb层及其下一子层的波形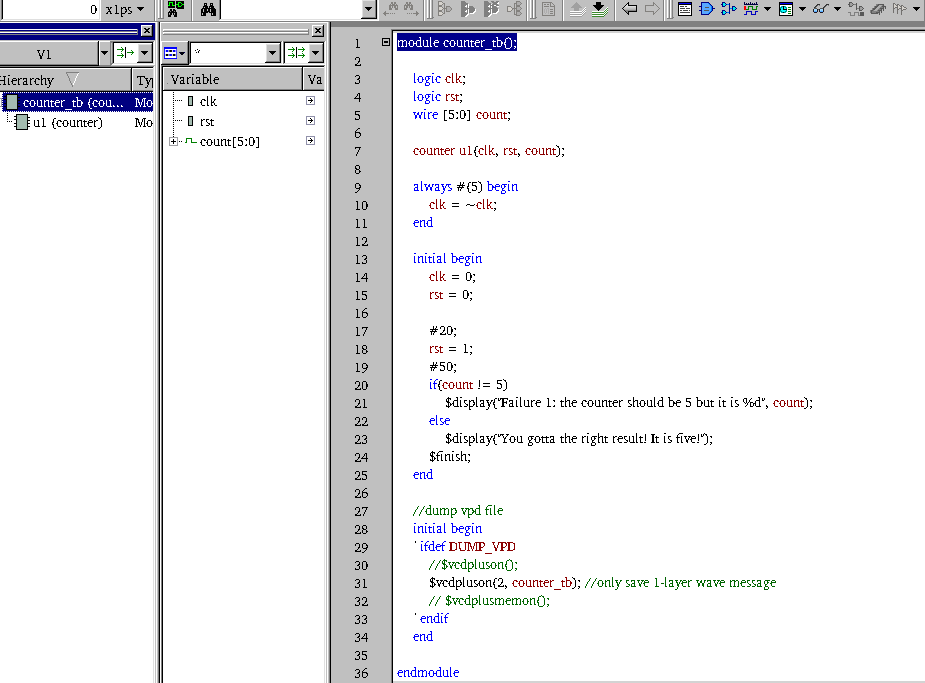
$vcdpluson(counter, counter_tb);也可以通过打出模块名的方式记录波形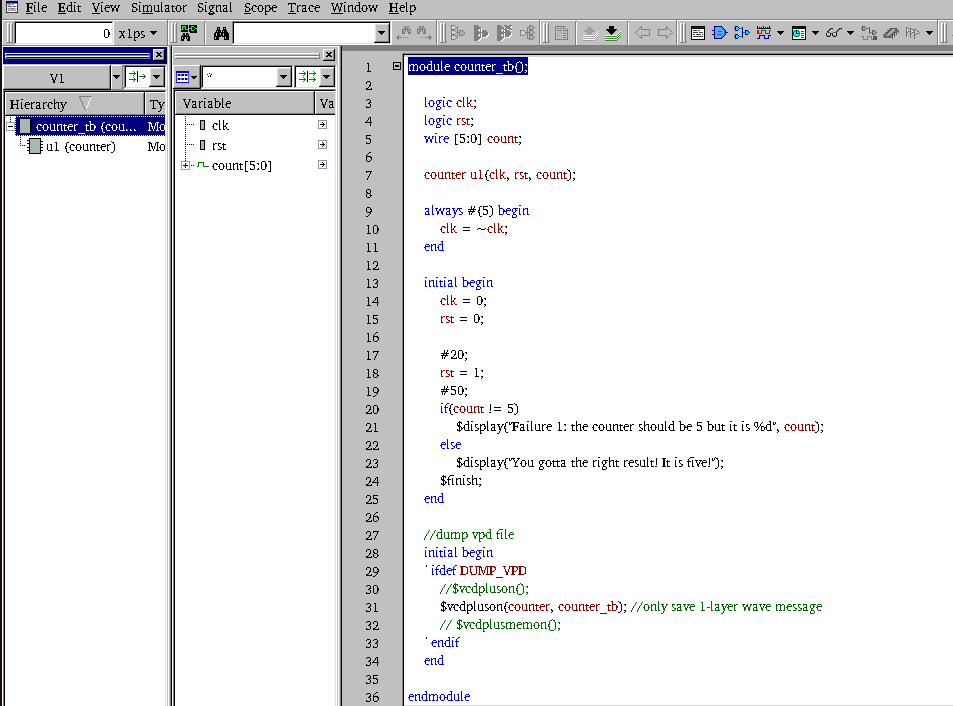
想要使用这个功能,需要在Testbench中加入如下代码:
1
2
3
4
5
6
7
8
//dump vpd file
initial begin
`ifdef DUMP_VPD
//$vcdpluson();
$vcdpluson(1, counter_tb); //only save 1-layer wave message
// $vcdplusmemon();
`endif
endfilelist.f也应该修改,加上宏定义
1
2
//Macro define
+define+DUMP_VPDMakefile文件也要做适当修改,完成的Makefile文件如下:
1
2
3
4
5
6
7
8
9
10
11
12
13
14
15
16
17
18
19
20
21
22
all: clean comp sim
#if you want to delete simv, recommend simv_* to rename
sim_name = simv_counter
#set a new vpd file name
vpd_name = +vpdfile+${sim_name}.vpd
clean:
rm -rf ./csrc *.daidir *.log simv* *.key *.vpd ./DVEfiles
comp:
vcs -full64 -cpp g++ -cc gcc -LDFLAGS -no-pie -LDFLAGS -Wl,--no-as-needed -CFLAGS -fPIE \
-sverilog +v2k -timescale=1ns/1ps \
-debug_acc+all \
${vpd_name} \
-o ${sim_name} \
-l compile.log \
-f filelist.f \
sim:
./${sim_name} ${vpd_name} -l sim.log在仿真完成后会生成simv_counter.vpd波形文件
- 可以使用
dve -vpd simv_counter.vpd &查看波形 - 或者使用
dve &打开gui界面后,再点击file处加载vpd文件

- 可以使用
2.$vcdplusmemon()的使用
VCS默认是不会记录数组波形的
若通过
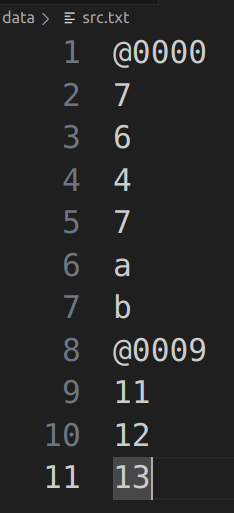
$readmemh读取文件中的数据,在Testbench中不添加$vcdplusmemon()时,读取的数据不会保存至vpd1
2
3
4
5
6
7
8
9//test readmemh
logic [7:0] mem[0:15];
integer i;
initial begin
$readmemh("./data/src.txt", mem);
for(i = 0; i<16; i = i + 1) begin
$display("mem[%2d] = %0h", i, mem[i]);
end
end- src.txt
- 打印相关信息
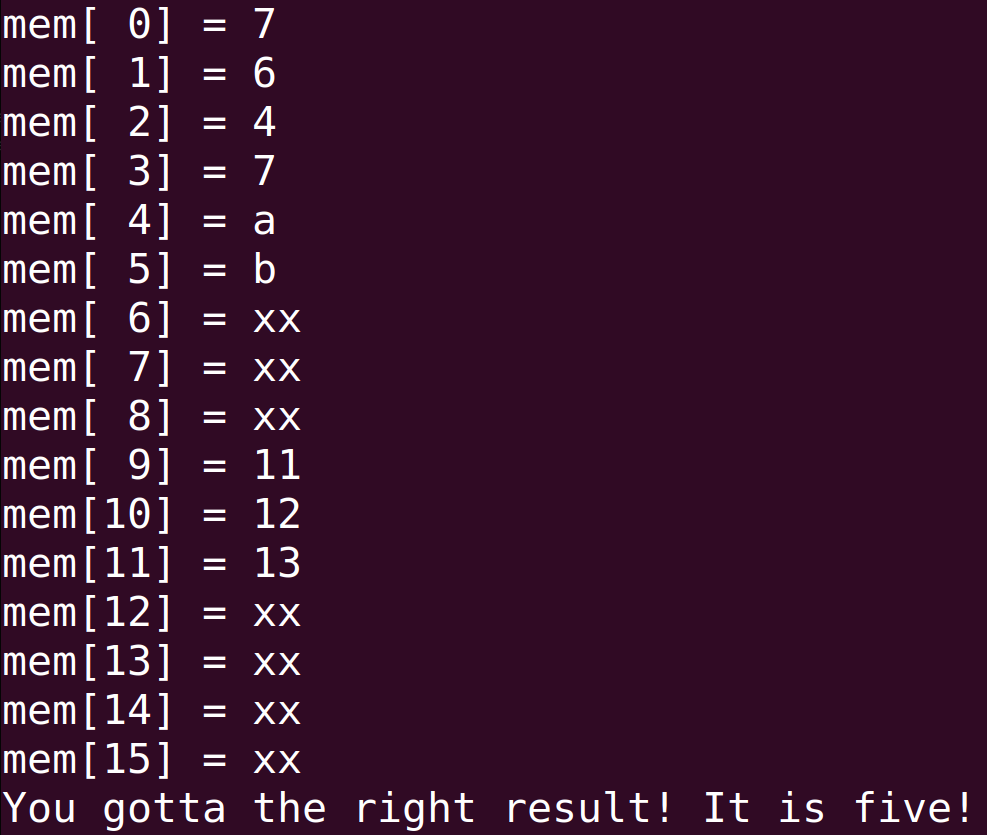
- 下图说明通过readmem读取的数据未保存至vpd文件中

若在Testbench中加上
$vcdplusmemon(),则能将数据保存至vpd文件中1
2
3
4
5
6
7
8//dump vpd file
initial begin
`ifdef DUMP_VPD
//$vcdpluson();
$vcdpluson(1, counter_tb); //only save 1-layer wave message
$vcdplusmemon();
`endif
end- 此时读取的数据被保存至vpd文件中

3.'__FILE__, '__LINE__两个宏
执行仿真之后,由于有上面的宏,将显示出文件路径以及执行的行数
源代码与testbench:
counter.sv
1
2
3
4
5
6
7
8
9
10
11
12
13
14
15
16
17
18module counter(
input clk,
input rst,
output logic [5:0] count
);
always @(posedge clk or negedge rst) begin
if(!rst)
count <= 0;
else
count <= count + 6'b1;
end
initial begin
$display("Hello Verilog! \t",`__FILE__,`__LINE__);
end
endmodulecounter_tb.sv
1
2
3
4
5
6
7
8
9
10
11
12
13
14
15
16
17
18
19
20
21
22
23
24
25
26
27
28
29
30
31
32
33
34
35
36
37
38
39
40
41
42
43
44
45
46
47
48
49
50
51
52
53
54module counter_tb();
logic clk;
logic rst;
wire [5:0] count;
counter u1(clk, rst, count);
always #(5) begin
clk = ~clk;
end
initial begin
clk = 0;
rst = 0;
#20;
rst = 1;
#50;
if(count != 5)
$display("Failure 1: the counter should be 5 but it is %d", count);
else
$display("You gotta the right result! It is five!");
$finish;
end
//dump vpd file
initial begin
`ifdef DUMP_VPD
//$vcdpluson();
$vcdpluson(1, counter_tb); //only save 1-layer wave message
$vcdplusmemon();
`endif
end
//test readmemh
logic [7:0] mem[0:15];
integer i;
initial begin
    $readmemh("./data/src.txt", mem);
    for(i = 0; i<16; i = i + 1) begin
        $display("mem[%2d] = %0h", i, mem[i]);
    end
end
initial begin
$display("Hello Verilog! \t",`__FILE__,`__LINE__);
end
initial begin
$display("Hello Verilog! \t",`__FILE__,`__LINE__);
end
endmodule结果如下:

4.gui界面
- 若仅仅是想交互性的观察仿真波形,可在编译后使用
/simv_counter -gui &来记载可视化界面
代码覆盖率
- Line coverage:行覆盖率,是否每一行都执行并且代码是完整的。例:缺少else,default;但这不一定是错误,可能故意为之;二次检查
- Toggle coverage:检查电路的每个节点是否都有 0 -> 1 和 1 -> 0 的跳变,但x->1,x->0不会检测,这种检查通常会使仿真变慢很多
- Condition coverage:条件覆盖率:代码中有if语句,实际可能出现某种情况,但程序没有覆盖
- FSM coverage:检测状态与状态之间是否都有跳转
path coverage:在always语句块和initial语句块中,有时会使用 if … else 和 case 语句,在电路结构上便会产生一系列的数据路径,检查这些路径的覆盖情况
Makefile
1
2
3
4
5
6
7
8
9
10
11
12
13
14
15
16
17
18
19
20
21
22
23
24
25
26
27
28
29
30
31
32
33
34
35
36
37all: clean comp sim
#if you want to delete simv, recommend simv_* to rename
sim_name = simv_counter
#set a new vpd file name
vpd_name = +vpdfile+${sim_name}.vpd
#Code coverage command
CM = -cm line+cond+fsm+branch+tgl
CM_NAME = -cm_name ${sim_name}
CM_DIR = -cm_dir ./${sim_name}.vdb
clean:
rm -rf ./csrc *.daidir *.log simv* *.key *.vpd ./DVEfiles ${sim_name} *.vdb
comp:
vcs -full64 -cpp g++ -cc gcc -LDFLAGS -no-pie -LDFLAGS -Wl,--no-as-needed -CFLAGS -fPIE \
-sverilog +v2k -timescale=1ns/1ps \
-debug_acc+all \
${vpd_name} \
${CM} \
${CM_NAME} \
${CM_DIR} \
-o ${sim_name} \
-l compile.log \
-f filelist.f \
sim:
./${sim_name} \
${vpd_name} \
${CM} ${CM_NAME} ${CM_DIR} \
-l sim.log \
#show the coverage
cov:
dve -full64 -covdir *.vdb &使用
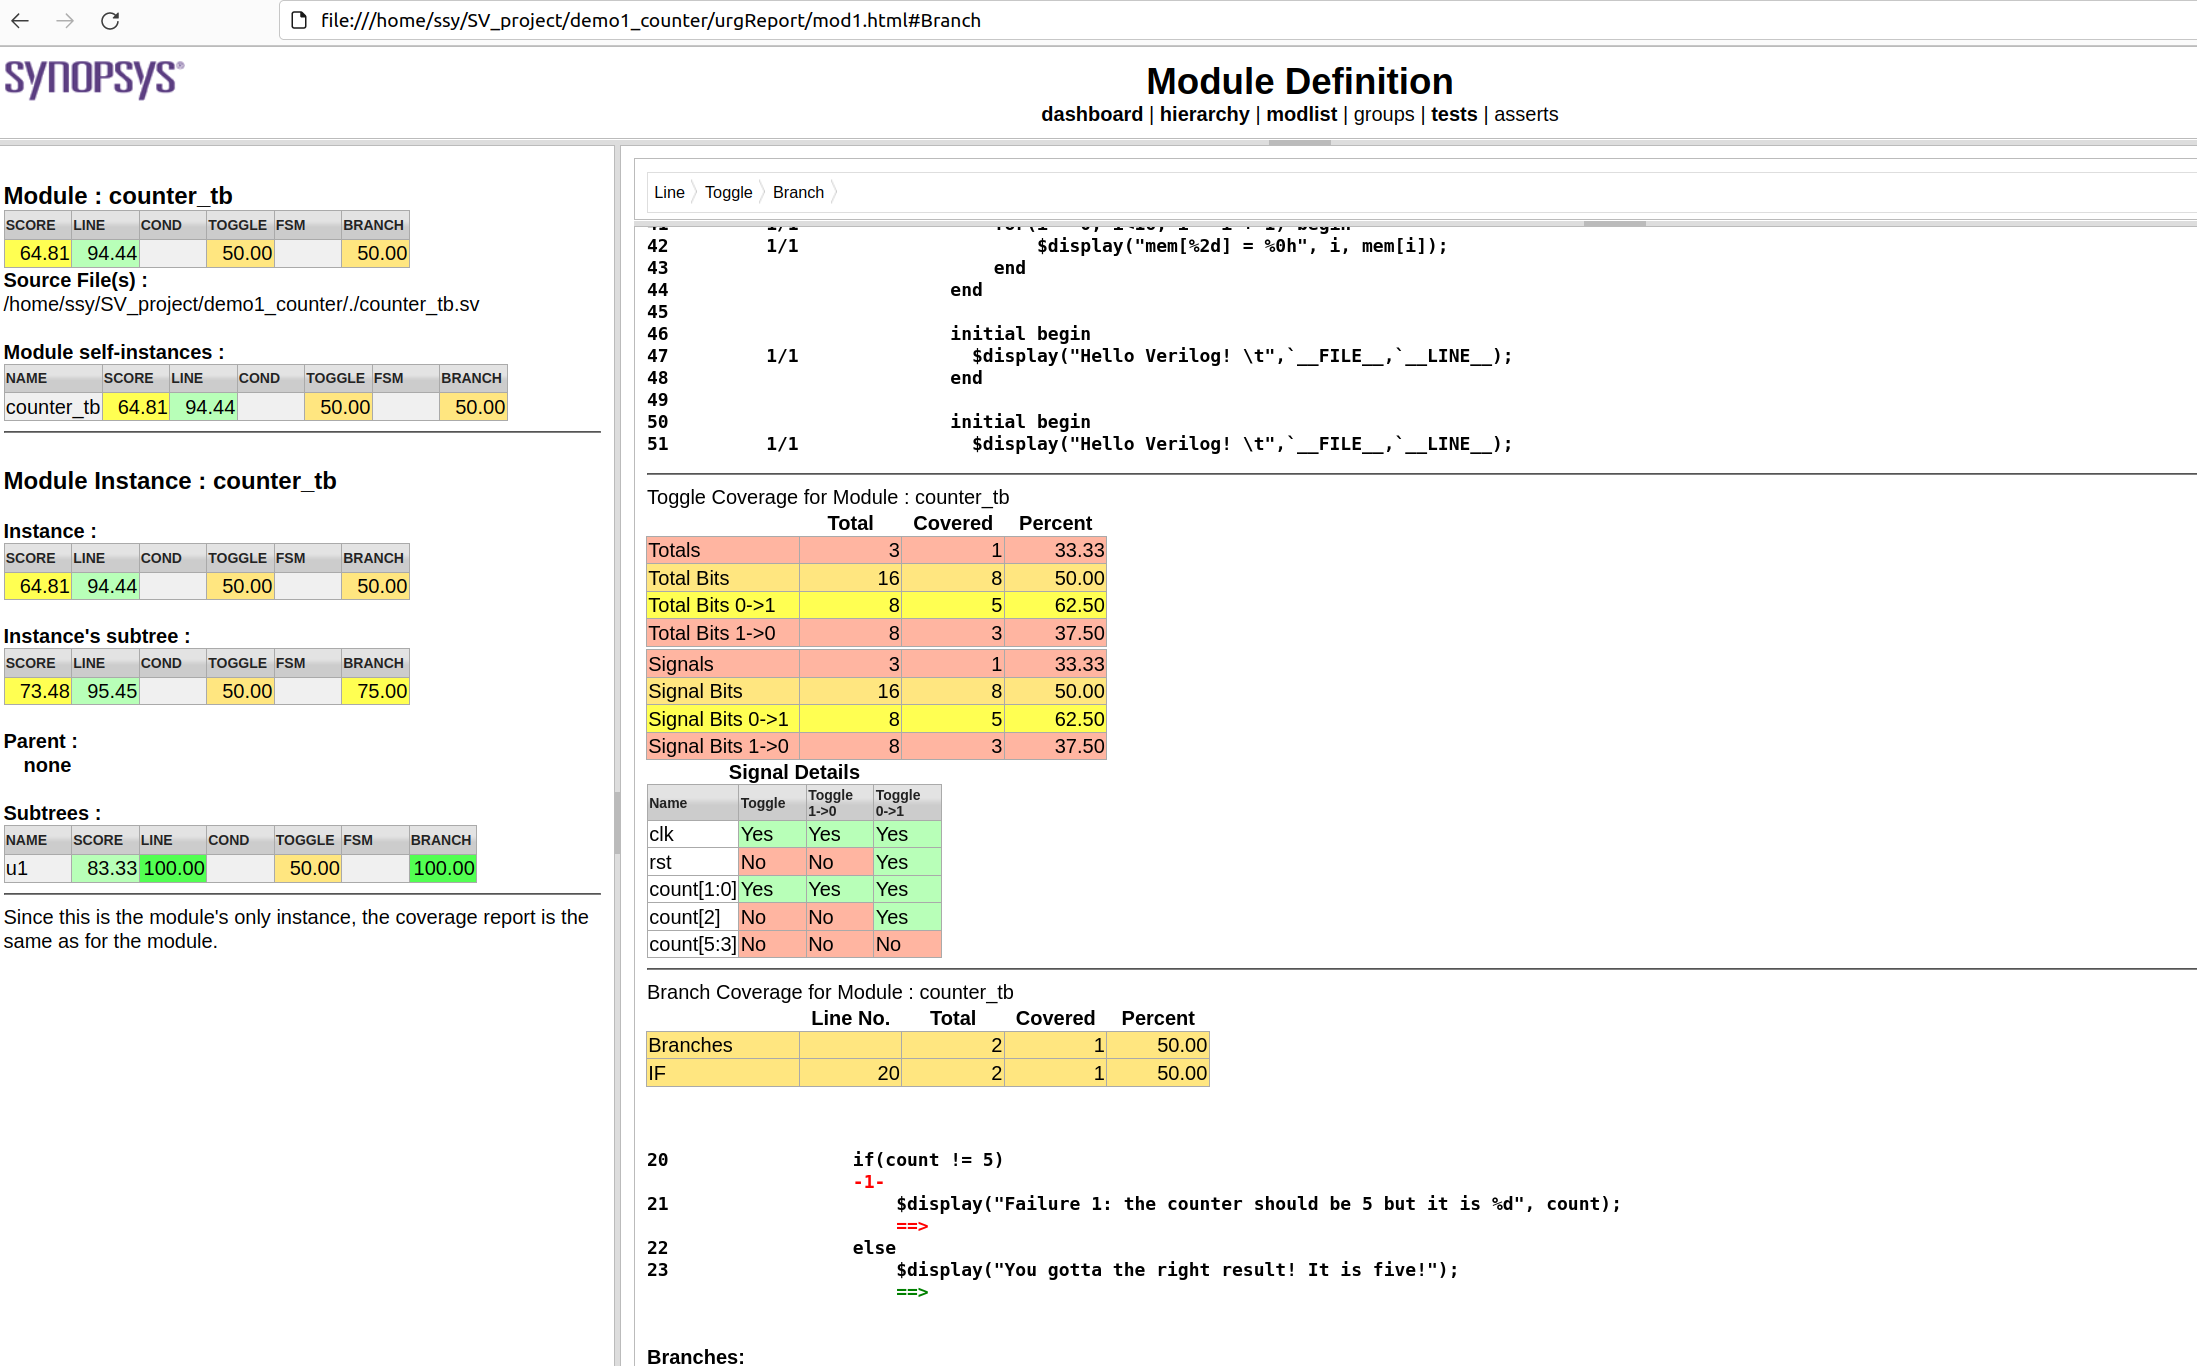
make cov显示覆盖率的可视化页面(要在仿真之后查看)
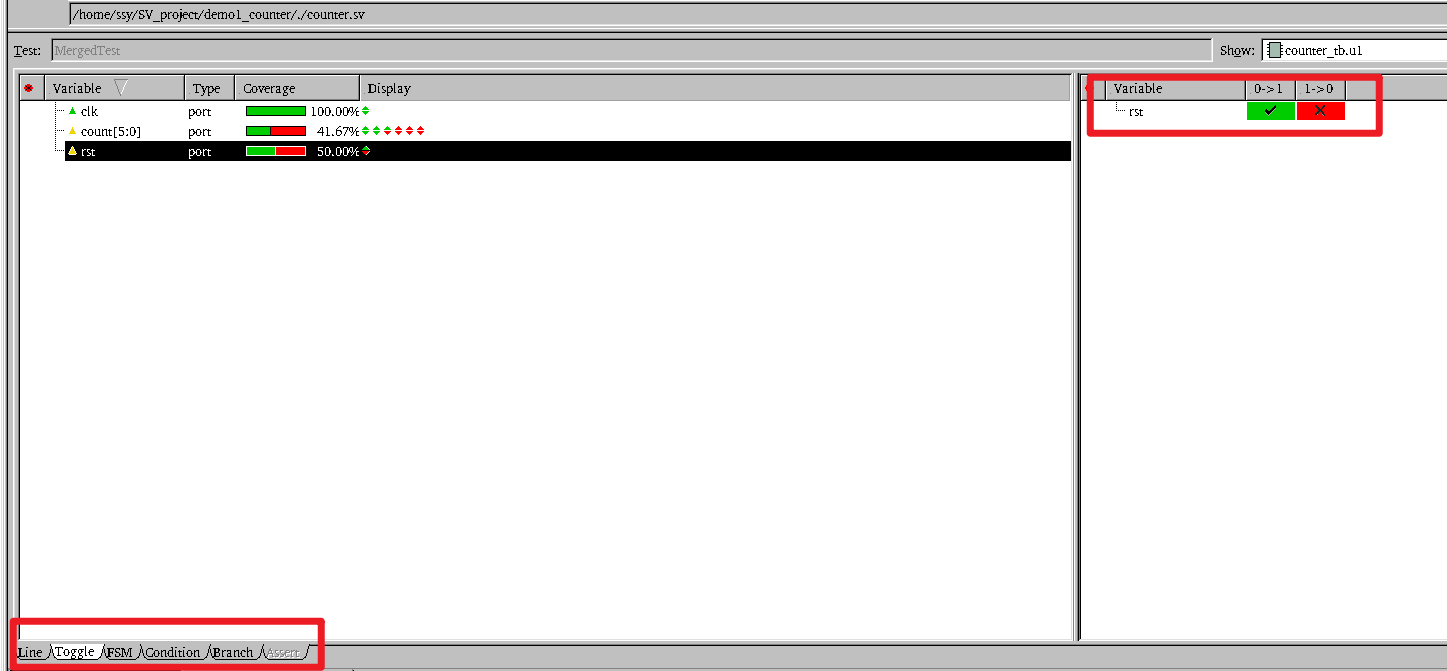
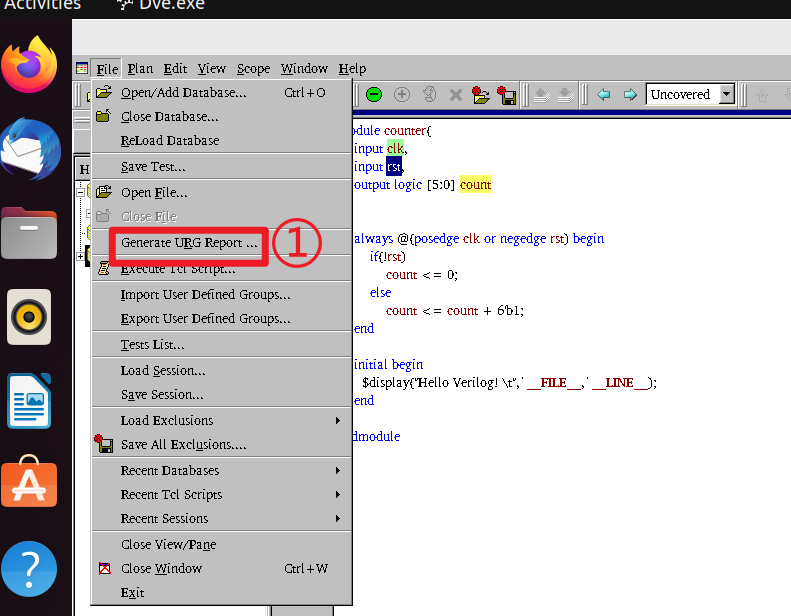
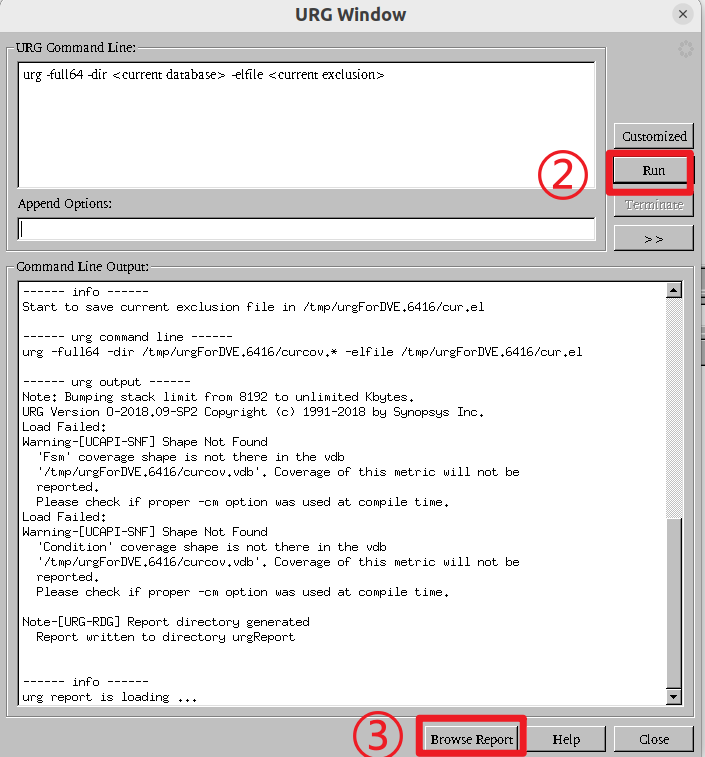
还可以通过网页查看覆盖率报告:
屏蔽覆盖率:
针对某段code屏蔽覆盖率报告但不屏蔽综合:
1
2
3
4
5
//VCS coverage off
initial begin
$display("Hello Verilog! \t",`__FILE__,`__LINE__);
end
//VCS coverage on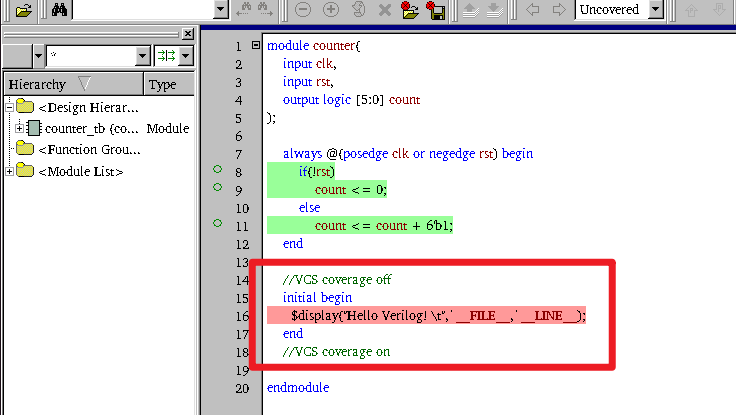
针对某段code屏蔽覆盖率报告且屏蔽综合:
1
2
3
4
5
//synopsys translate_off
initial begin
$display("Hello Verilog! \t",`__FILE__,`__LINE__);
end
//synopsys translate_on
