本节主要介绍了卷积神经网络的基本概念,并以cifar10图像分类任务为例,学习了VGGNET、RESNET、MobileNet、InceptionModule等常见网络的搭建。
卷积层
1.torch.nn.Conv2d
- 对图像和滤波矩阵做内积(逐个元素相乘再求和)的操作
torch.nn.Conv2d(in_channels,out_channels,kernel_size,stride=1,padding=0,dilation=1,groups=1,bias=True,padding_mode='zeros')- in_channels(int):输入的特征维度
- out_channels(int):输出的特征维度
- kernel_size(int or tuple):卷积核大小
- stride(int or tuple):卷积的步幅,默认值为1
- padding(int or tuple):添加到输入两侧的零填充数量,默认值为0
- dilation(int or tuple):内核元素之间的间距,默认值为1
- groups(int):从输入通道到输出通道的阻塞连接数
- bias(bool):默认值为True,如果为True,则向输出添加可学习的偏差
- padding_mode(str):可选值为”zeros”、”reflect”、”replicate”、“circular”,默认值为”zeros”
输入输出形状的关系:
dilation:扩张操作,控制kernel点(卷积核点)的间距

padding_mode:填充方式
Same Padding:在stride为1的情况下,若想让输入输出尺寸一致,需要指定padding数为kerner_size的一半
Full Padding:在stride为1的情况下,padding=kerner_size-1
2.torch.nn.ConvTranspose2d
torch.nn.ConvTranspose2d(in_channels, out_channels, kernel_size, stride=1, padding=0, output_padding=0, groups=1, bias=True, dilation=1, padding_mode='zeros')在反卷积中,stride参数就是表示往输入图片每两个像素点中间填充0,而填充的数量就是 stride - 1
输入与输出形状的关系:
output_padding的作用就是:在输出图像右侧和下侧补值,用于弥补stride大于1带来的缺失
ConvTranspose2d可用于上采样
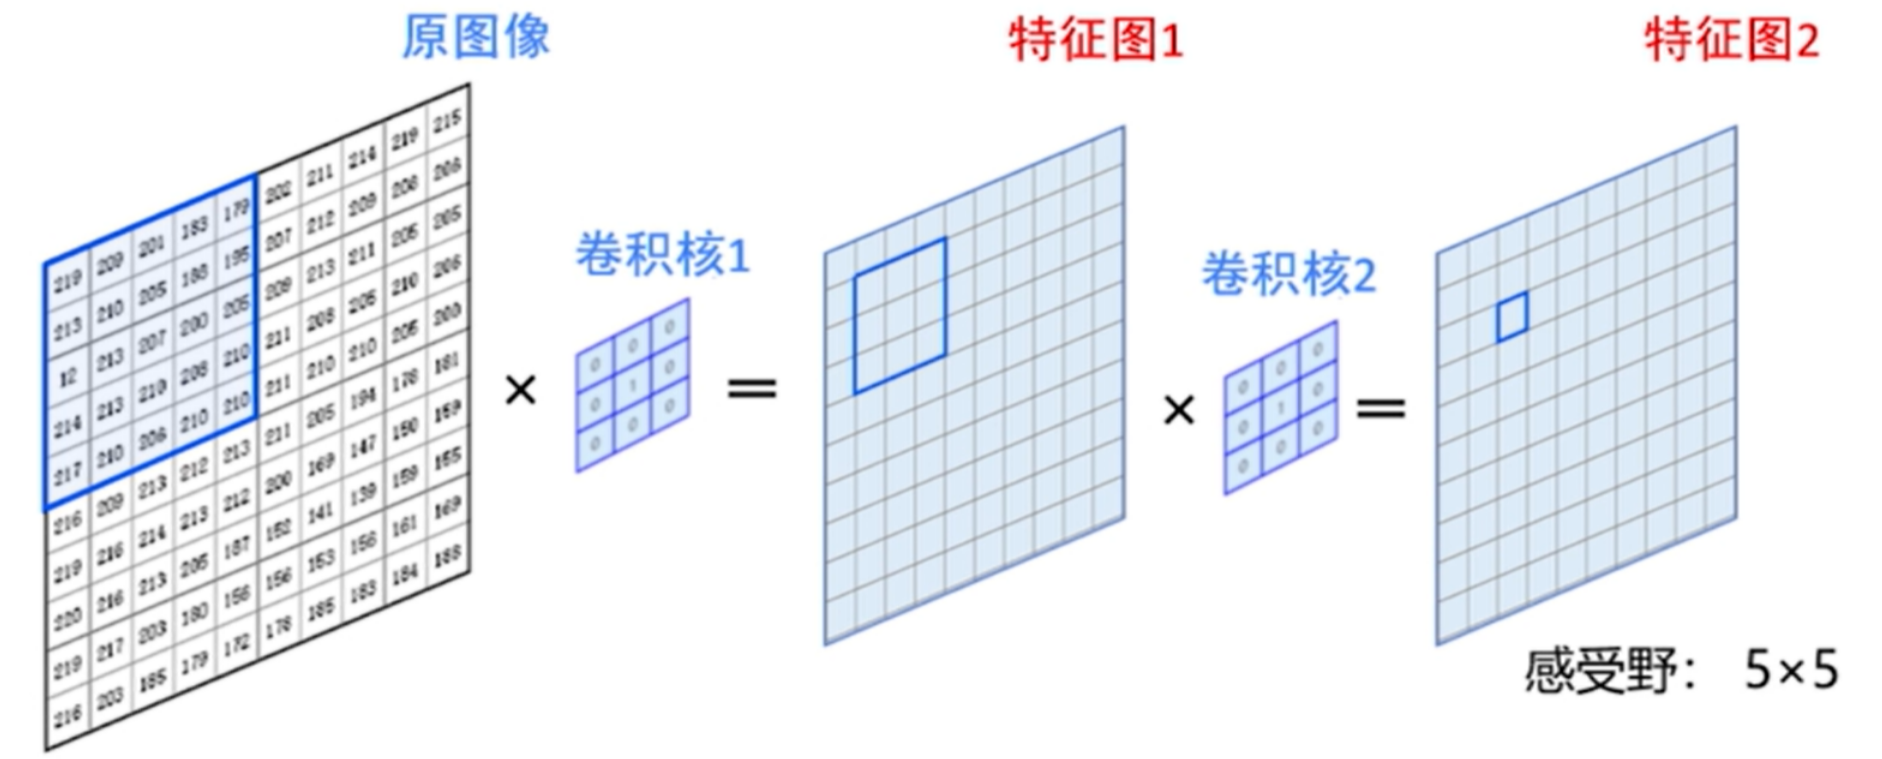
3.感受野
- 使用两个3×3的卷积核级联与使用一个5×5的卷积核得到的感受野是一样的,但参数个数却少了
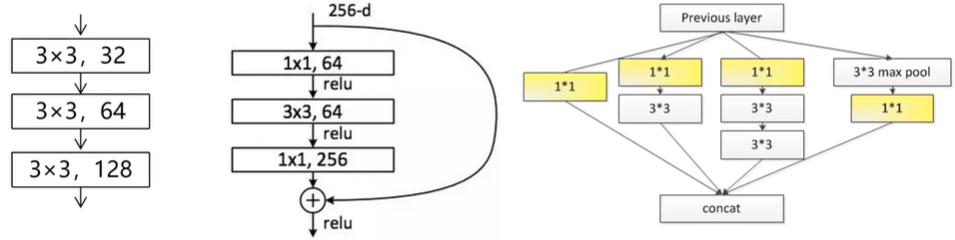
4.常见的卷积层组合结构
堆叠—跳连—并连
5.池化层
- 对输入的特征图进行压缩:
- 一方面使特征图变小,简化网络计算复杂度
- 一方面进行特征压缩,提取主要特征
最大池化:
torch.nn.MaxPool2d(kernel_size, stride=None, padding=0, dilation=1, return_indices=False, ceil_mode=False)- kernel_size :表示做最大池化的窗口大小,可以是单个值,也可以是tuple元组
- stride :步长,可以是单个值,也可以是tuple元组。如果不指定这个参数,那么默认步长跟最大池化窗口大小一致。如果指定了参数,那么将按照我们指定的参数进行滑动
- padding :填充,可以是单个值,也可以是tuple元组
- dilation :控制窗口中元素步幅
- return_indices :布尔类型,返回最大值位置索引
- ceil_mode :布尔类型,为True,用向上取整的方法,计算输出形状;默认是向下取整。
输入与输出形状的关系:
激活层
- 激活函数:为了增加网络的非线性,进而提升网络的表达能力
- 卷积层后经常加上ReLU层去提高网络的非线性表达能力
torch.nn.ReLU()
BatchNorm层
- 通过一定的规范化手段,把每层神经网络任意神经元这个输入值的分布强行拉回到均值为0方差为1的标准正态分布中
- Batchnorm是归一化的一种手段,它会减小图像之间的绝对差异,突出相对差异,加快训练速度
- BN的缺点:
- batch_size较小的时候,效果差。BN的过程,使用整个batch中样本的均值和方差来模拟全部数据的均值和方差,在batch_size 较小的时候,效果肯定不好
- BN在RNN中效果比较差
nn.BatchNorm2d(num_features)
Dropout层
- 在不同的训练过程中随机扔掉一部分神经元
- 测试过程中不使用随机失活,所有的神经元都激活
- 为了防止或减轻过拟合而使用的函数,它一般用在全连接层
nn.dropout
损失层
- 损失层:设置一个损失函数用来比较网络的输出和目标值,通过最小化损失来驱动网络的训练
- 网络的损失通过前向操作计算,网络参数相对于损失函数的梯度则通过反向操作计算
- 分类问题损失函数:
nn.BCELoss(二分类问题)、nn.CrossEntropyLoss(多分类问题)等- 用于分类或分割等问题中
- 回归问题损失:
nn.L1Loss、nn.MSELoss、nn.SmoothL1Loss等- PyTorch中的损失函数—L1Loss /L2Loss/SmoothL1Loss - 知乎 (zhihu.com)
- 【Pytorch基础】torch.nn.MSELoss损失函数_一穷二白到年薪百万的博客-CSDN博客
- 用于检测或回归问题中
学习率与优化器
- 学习率作为监督学习以及深度学习中重要的超参,其决定着目标函数能否收敛到局部最小值以及何时收敛到最小值
- 合适的学习率能够使目标函数在合适的时间内收敛到局部最小值
- torch.optim.lr_sheduler:
- ExponentialR
- ReduceLROnPlateau
- CyclicLR等
- 优化器:pytorch中使用torch.optim优化神经网络以及优化器的选择 - pytorch中文网 (ptorch.com)
cifar10图像分类任务
1.读取cifar10数据集
cifar10训练集包括5个batch,每个batch有10000个数据,每个数据又以字典的形式存储了图片所在的batch值,图片标签,图片数据(3072个数据,即$32\times 32\times 3$),图片名称
1
dict_keys([b'batch_label', b'labels', b'data', b'filenames'])
打印每张图片标签、图片名称(注意这里名称是byte存储形式)、图片数据 nj
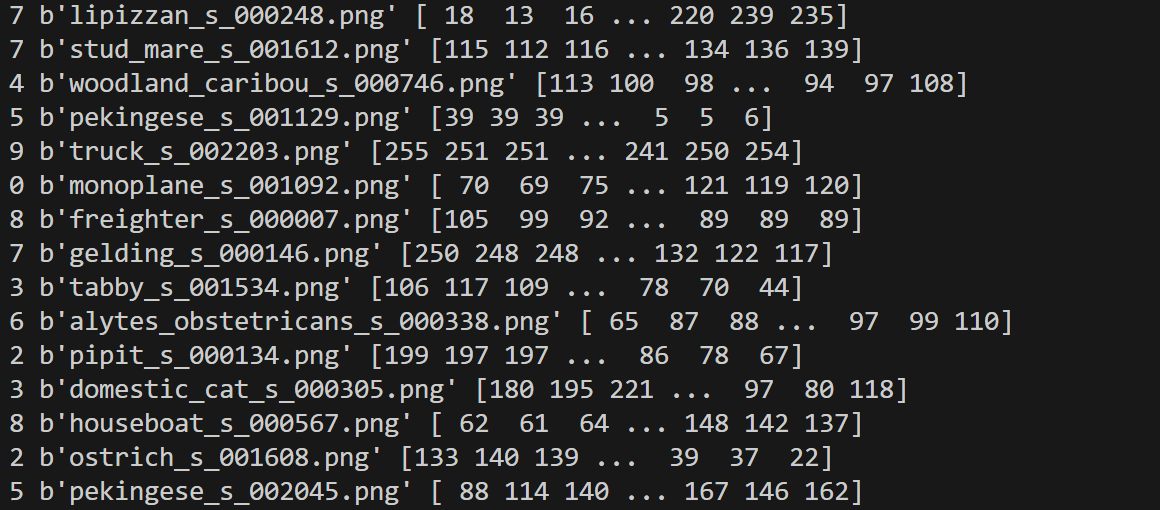
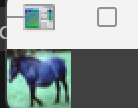
可视化图片数据$32\times 32\times 3$
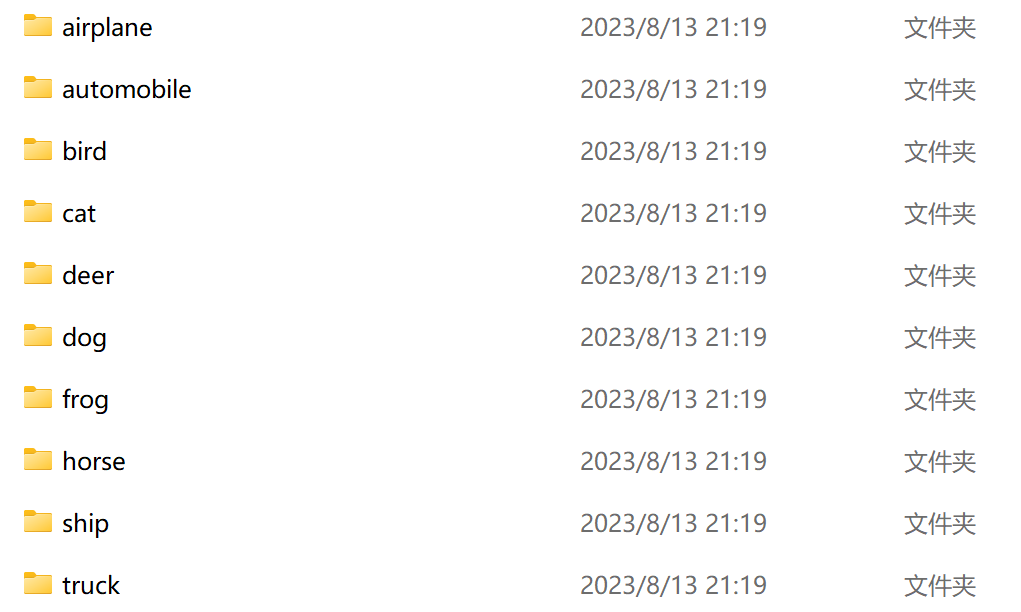
每个类别存储在对应文件夹中:
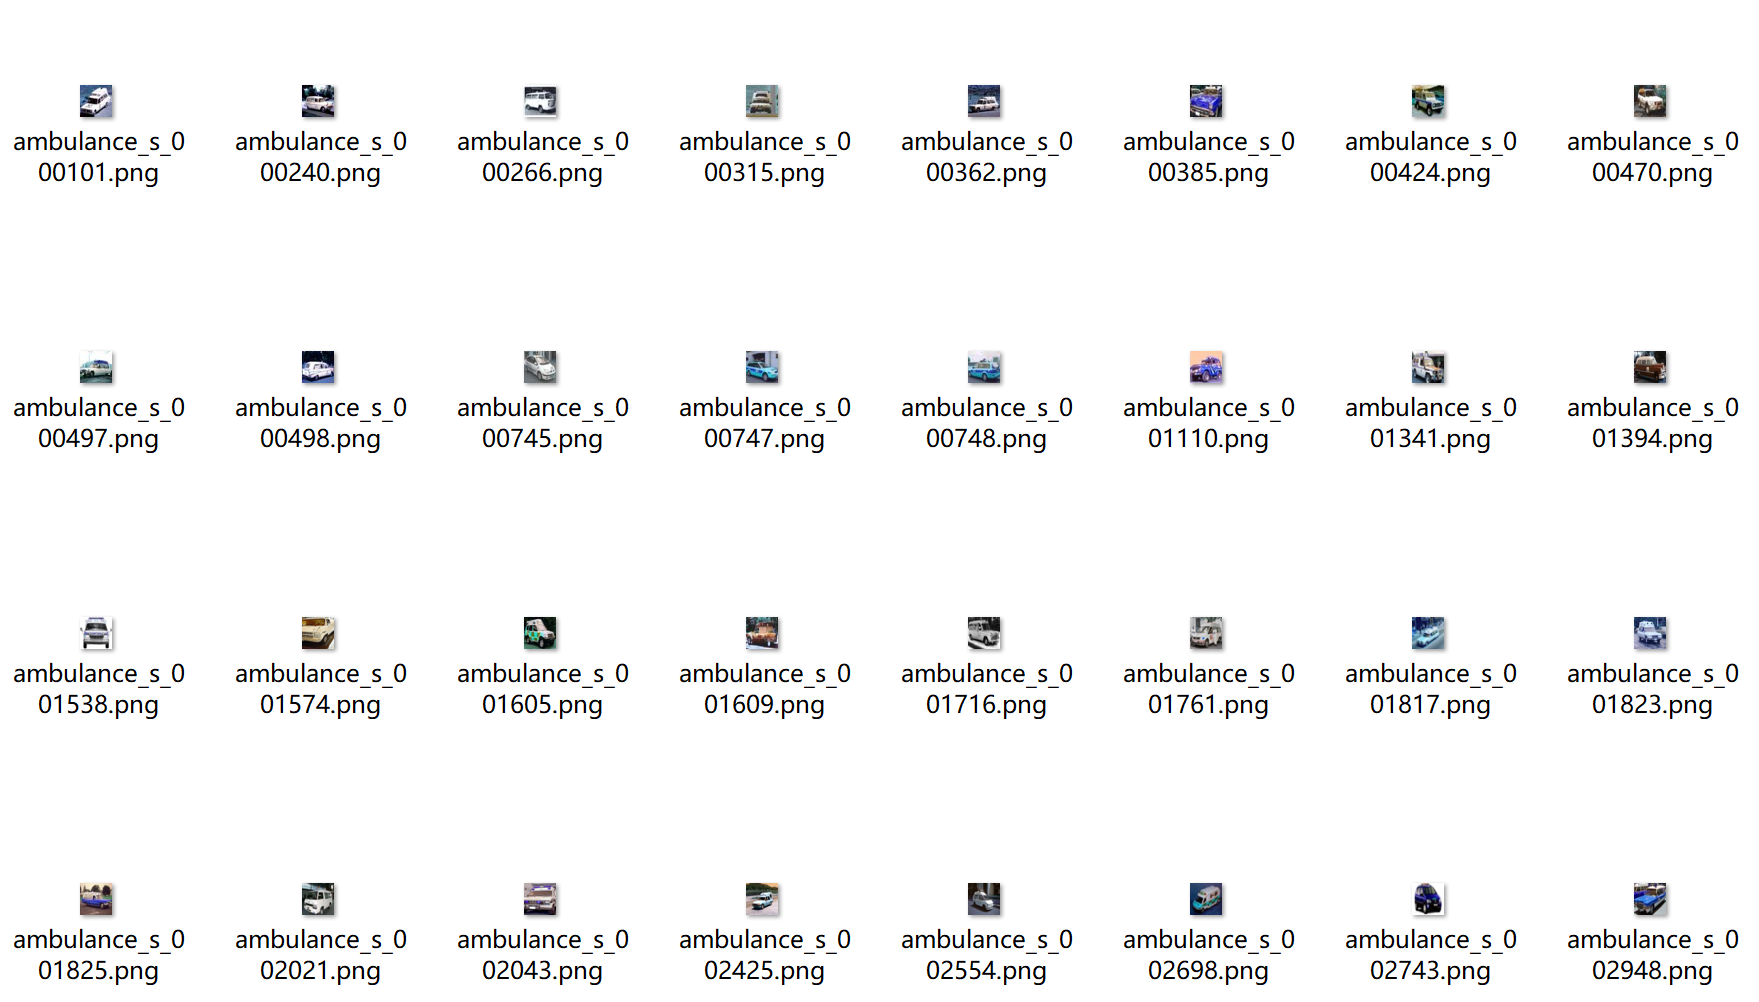
最终图片存储形式:
readcifar10.py
1
2
3
4
5
6
7
8
9
10
11
12
13
14
15
16
17
18
19
20
21
22
23
24
25
26
27
28
29
30
31
32
33
34
35
36
37
38
39
40
41
42
43
44
45
46
47
48
49
50
51
52
53
54
55
56
57
58
59
import os
import cv2
import numpy as np
#在cifar10官网拷贝cifar10数据解析函数
def unpickle(file):
import pickle
with open(file, 'rb') as fo:
dict = pickle.load(fo, encoding='bytes')
return dict
#定义10个label
label_name = ["airplane",
"automobile",
"bird",
"cat",
"deer",
"dog",
"frog",
"horse",
"ship",
"truck"]
#训练图片数据存放的路径
save_path = "D:\\App_Data_File\\VScode_Project\\Python\\Pytorch\\Cifar10\\cifar10_batches_py\\TRAIN" #将TRAIN改为TEST即可处理测试集中的内容
import glob #调用glob读取当前文件夹下匹配的文件
train_list = glob.glob("D:\\App_Data_File\\VScode_Project\\Python\\Pytorch\\Cifar10\\cifar10_batches_py\\data_batch_*")#将data_batch_*改为test_batch*即可处理测试集中的内容
#print(train_list) #以列表的形式存储了五个文件路径
for l in train_list:
#print(l)
l_dict = unpickle(l)
#print(l_dict)
#print(l_dict.keys()) #打印字典的所有键值key
for im_idx, im_data in enumerate(l_dict[b'data']):
#print(im_idx)
#print(im_data)
im_label = l_dict[b'labels'][im_idx]
im_name = l_dict[b'filenames'][im_idx]
#print(im_label, im_name, im_data) #打印每张图片标签、图片名称、图片数据
#将数据转化为图片形式存储在TRAIN文件夹中
im_label_name = label_name[im_label]
im_data = np.array(im_data) #将图片数据转化为np形式
im_data = im_data.reshape(3, 32, 32) #将图片转化为32*32*3的格式
im_data = im_data.transpose(1, 2, 0)
#cv2.imshow('im_data', im_data) #可视化读取的图片数据
#cv2.waitKey(0)
if not os.path.exists("{}\\{}".format(save_path, im_label_name)): #对每一个类别创建一个文件夹
os.mkdir("{}\\{}".format(save_path, im_label_name)) #如果不存在对应文件夹则创建文件夹
cv2.imwrite("{}\\{}\\{}".format(save_path, #通过imwrite写入图片
im_label_name,
im_name.decode("utf-8")),
im_data) #.decode("utf-8")将byte型转化为字符串型
2.自定义数据加载
- load_cifar10.py
1 | from torchvision import transforms |
结果如下:
1 | num_of_train 50000 |
3.VGGNET网络搭建与训练
- vggnet.py
1 | import torch |
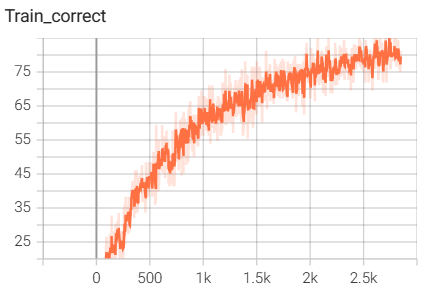
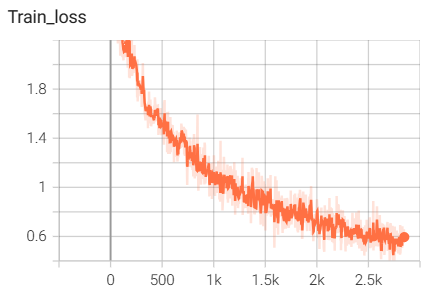
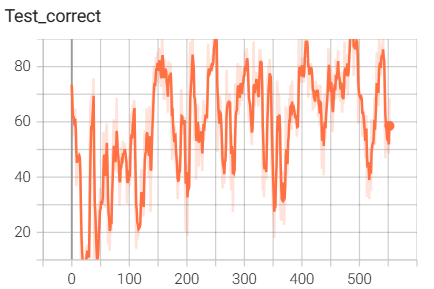
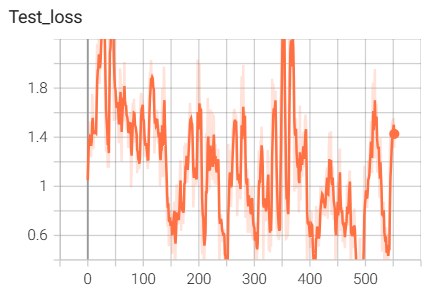
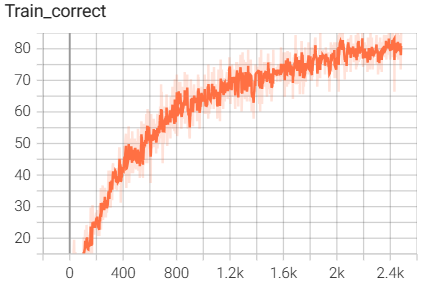
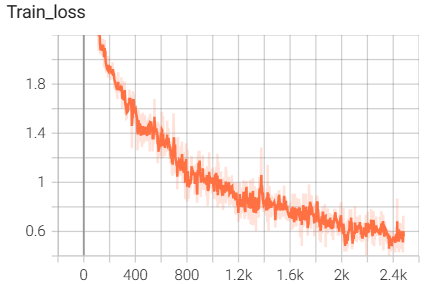
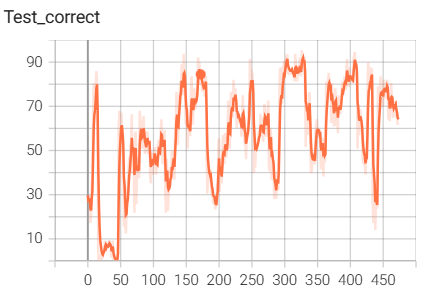
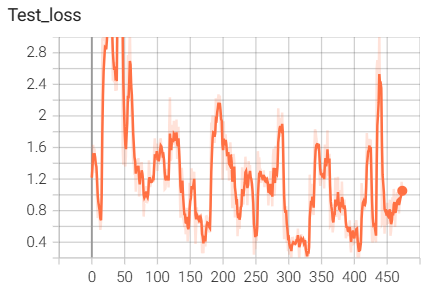
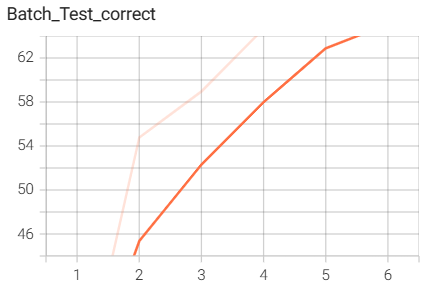
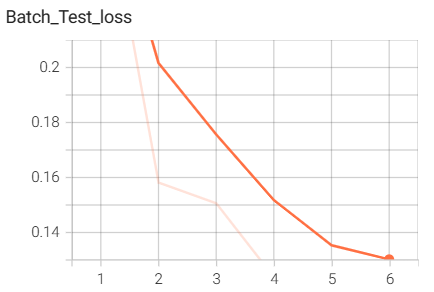
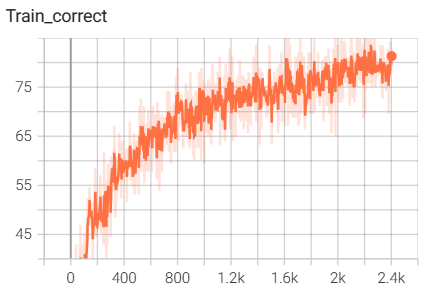
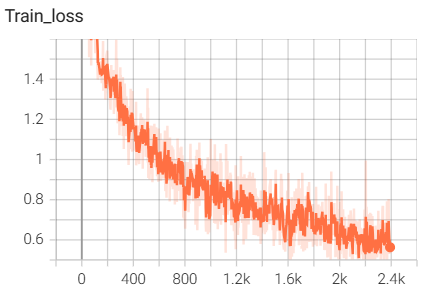
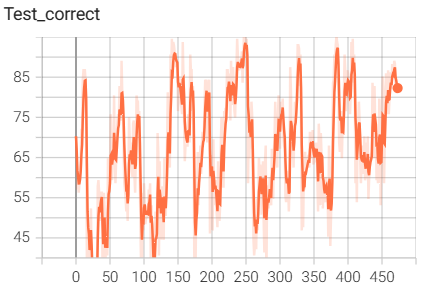
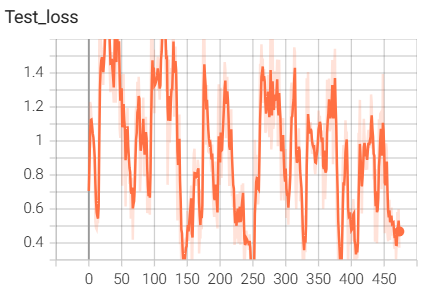
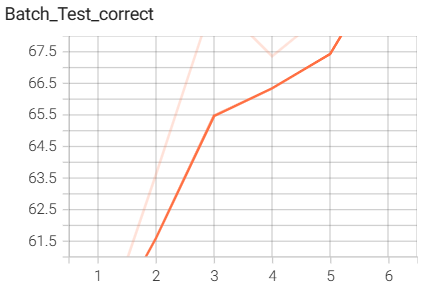
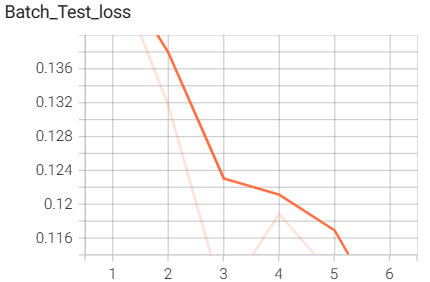
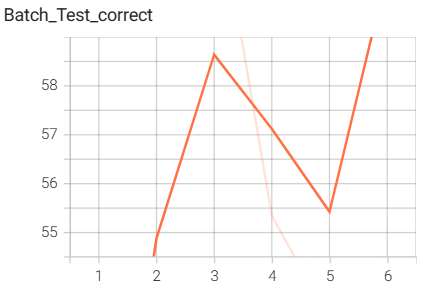
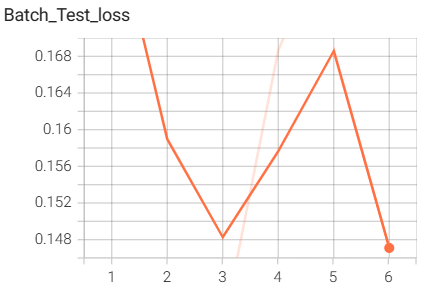
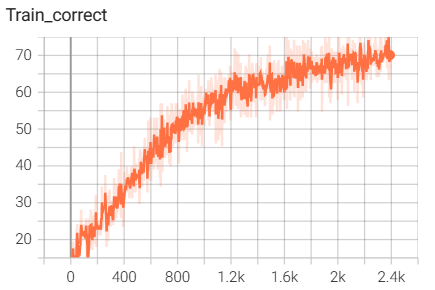
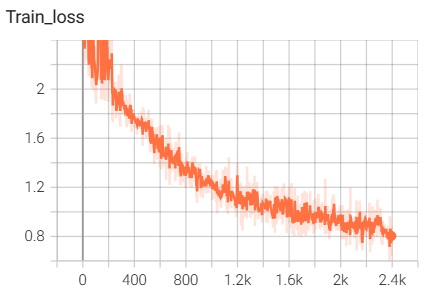
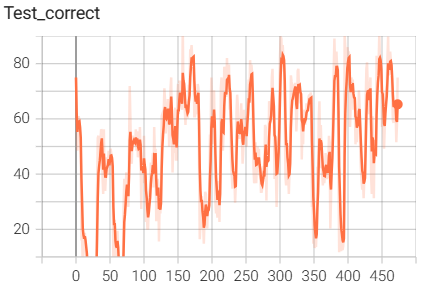
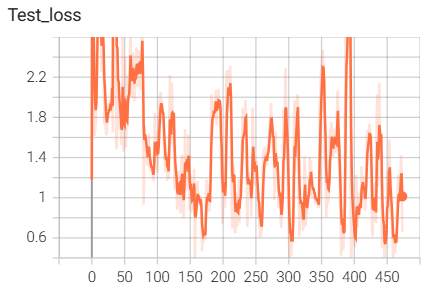
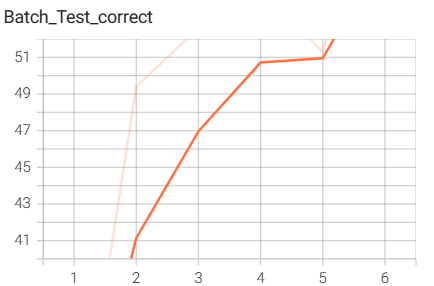
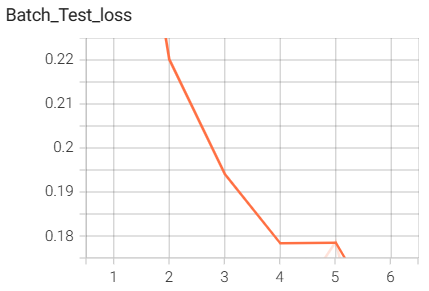
结果如下(训练了6个epoch的结果):
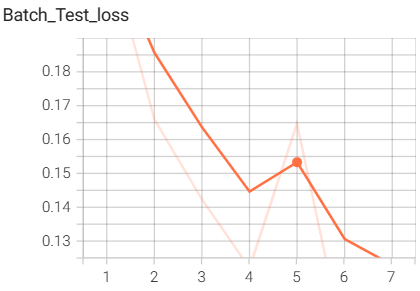
用tensorboard可视化的输入图像:
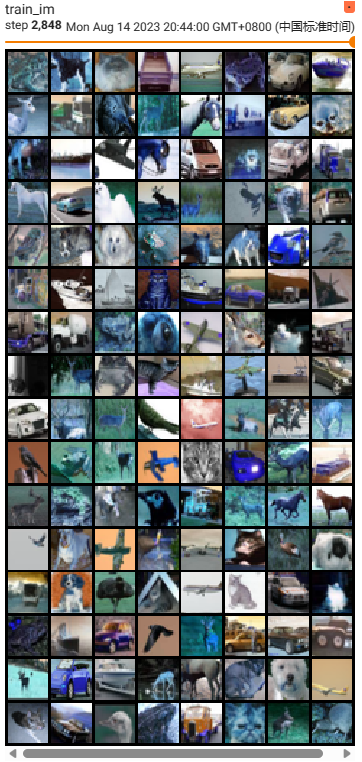 $\quad\quad\quad$
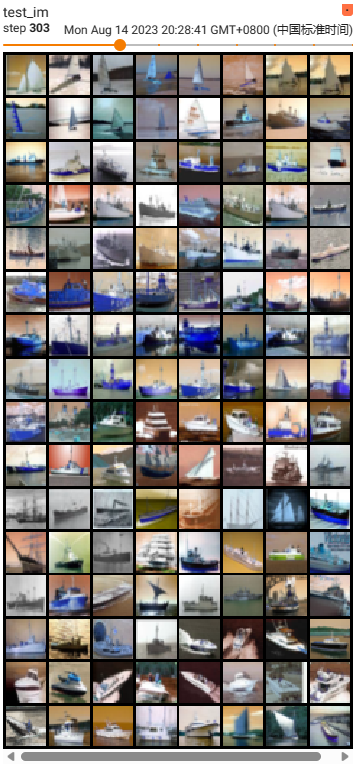
4.RESNET网络搭建与训练
- resnet.py
1 | import torch |
结果如下(训练了6个epoch的结果):
5.MobileNet网路搭建与训练
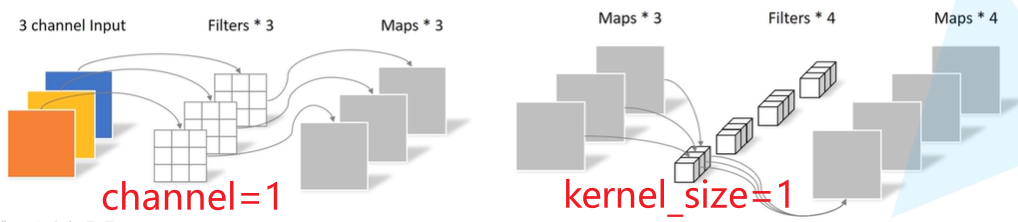
- dw中输入通道数等于输出通道数,卷积核的通道数为1,输入通道需要被分成in_channel组
- pw的输入为dw的输出,卷积核的大小为1
- MobileNet能压缩模型计算量
- mobilenetv1.py
1 | #轻量级网络:压缩模型计算量 |
结果如下(训练了6个epoch的结果):
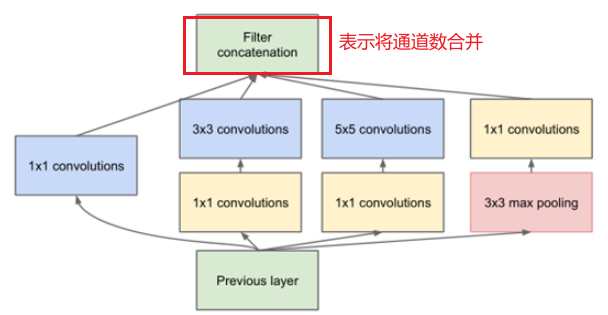
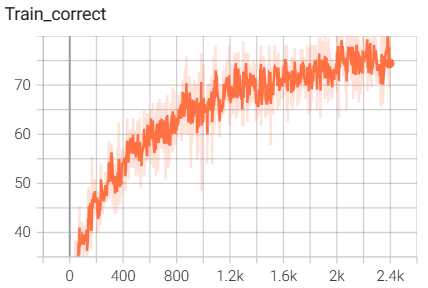
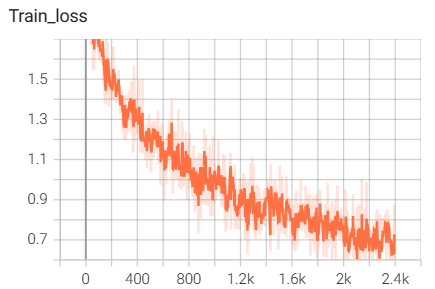
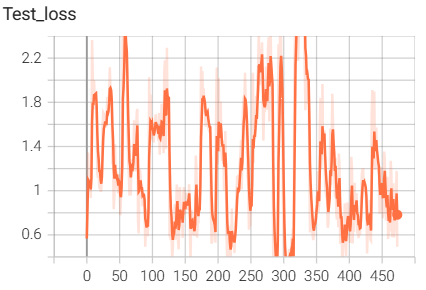
6.InceptionModule网络搭建与训练
使用1x1的卷积核实现降维操作(也间接增加了网络的深度),以此来减小网络的参数量
inceptionModule.py
1 | import torch |
结果如下(训练了6个epoch的结果):

7.pytorch中自带的ResNet18网络搭建与训练
- pytorch_resnet18.py
1 | #pytorch中提供的resnet18网络 |
结果如下(训练了6个epoch的结果):
8.模型训练相关的代码
- train.py
1 | import torch |
tensorboard可视化页面的使用:程序运行开始后,在终端中调用如下代码启动可视化页面,下面代码中路径为log文件夹所在位置
1
tensorboard --logdir="D:\App_Data_File\VScode_Project\Python\Pytorch\Cifar10\logs\InctionNetSmall"
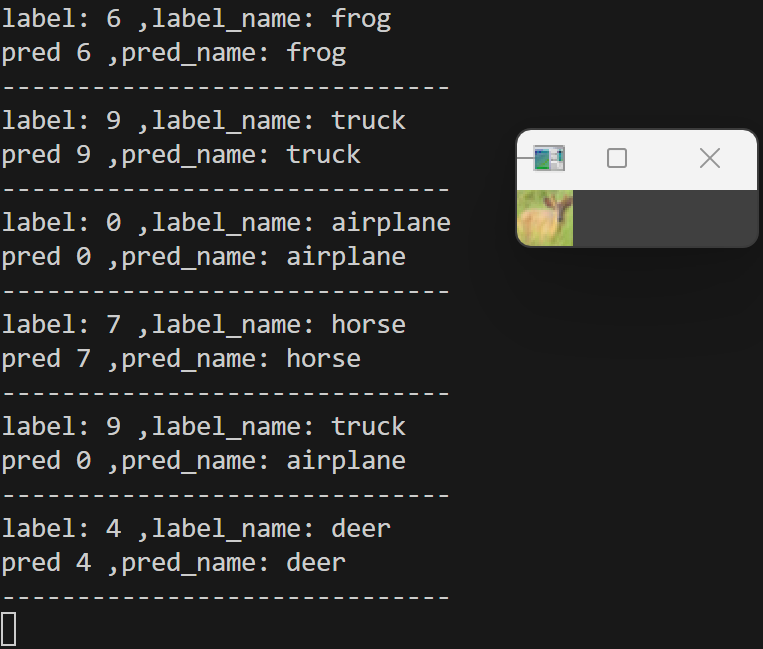
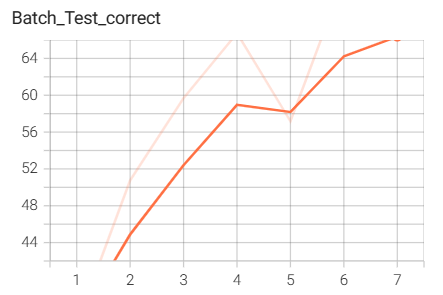
9.模型验证
- test.py
1 | import torch |
结果如下: