这里记录着小沈学习在Python过程中遇到的6个重要又有趣的Python标准库与第三方库,分别是turtle库、time库、random库、PyInstaller库、jieba库、wordcloud库。
Turtle库
turtle库是Python语言的标准库之一,是入门级的图形绘制函数库。
1.Turtle的绘图窗体
turtle.setup(width,height,startx,starty)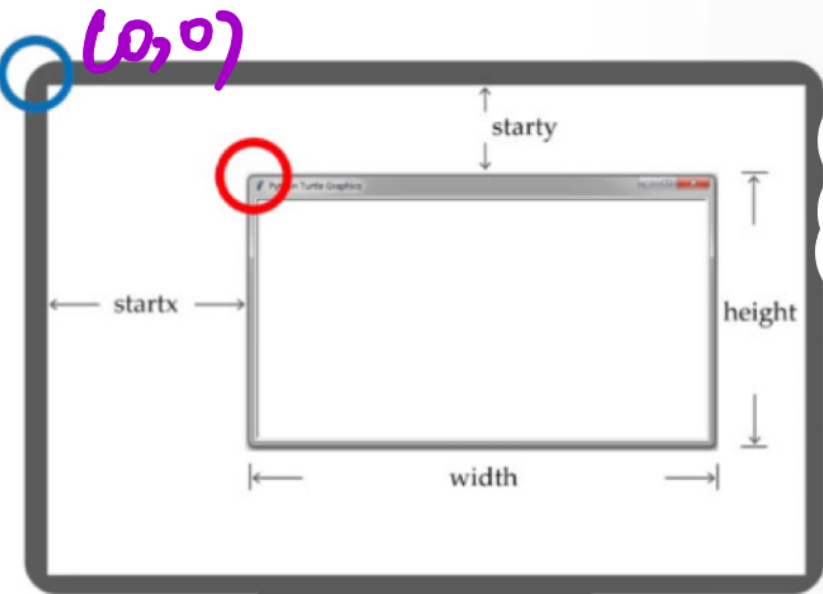
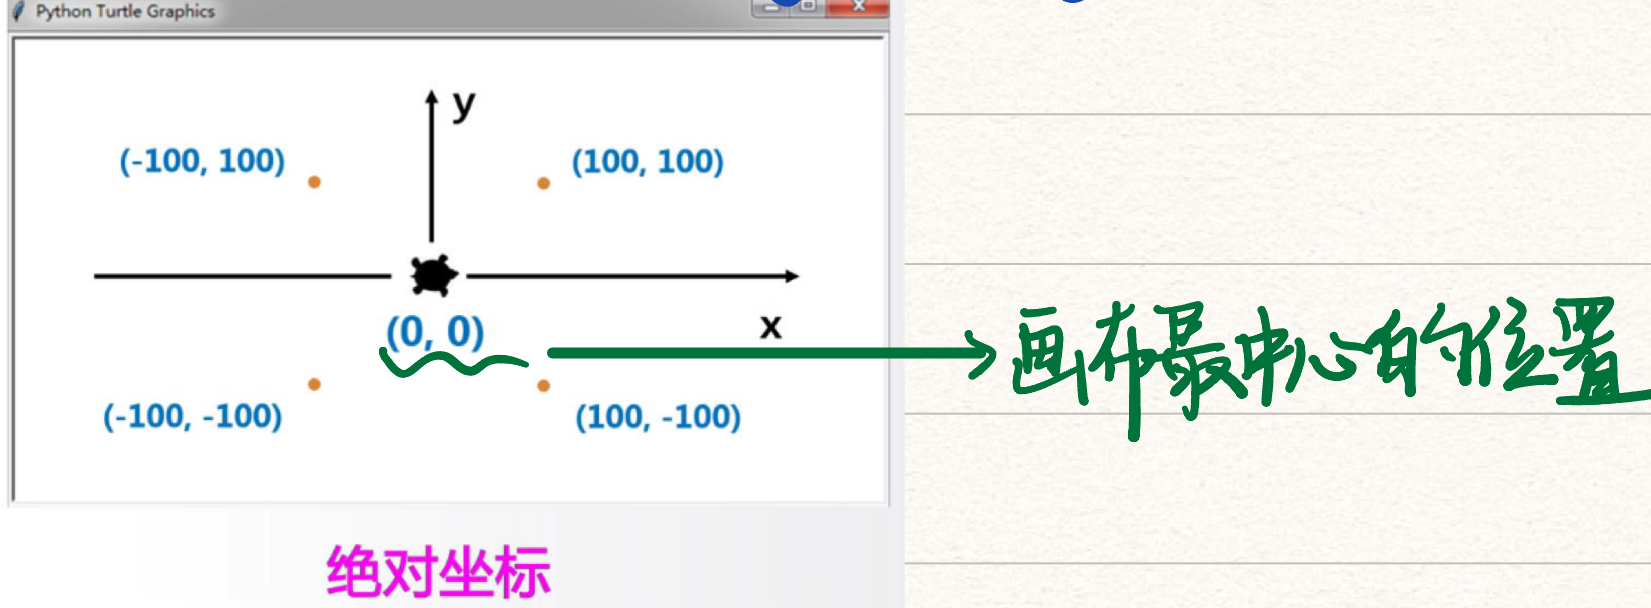
2.Turtle空间坐标体系及其绘制
- 绝对坐标:
turtle. goto(x,y)
相对坐标:
turtle.circle(r,angle)#画圆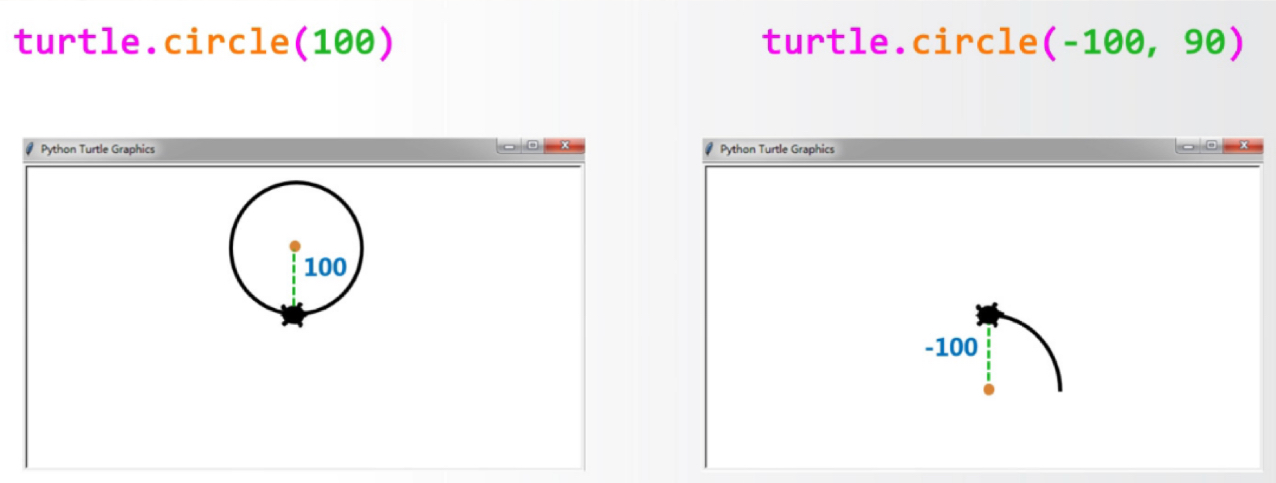
turtle.bk(d)#后退turtle.fd(d)#前进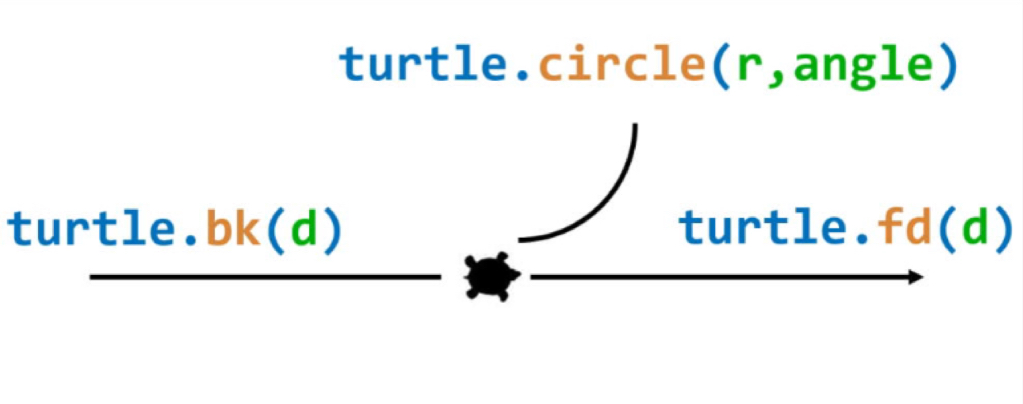
3.Turtle角度坐标体系及其角度改变
绝对角度:
turtle.seth(angle)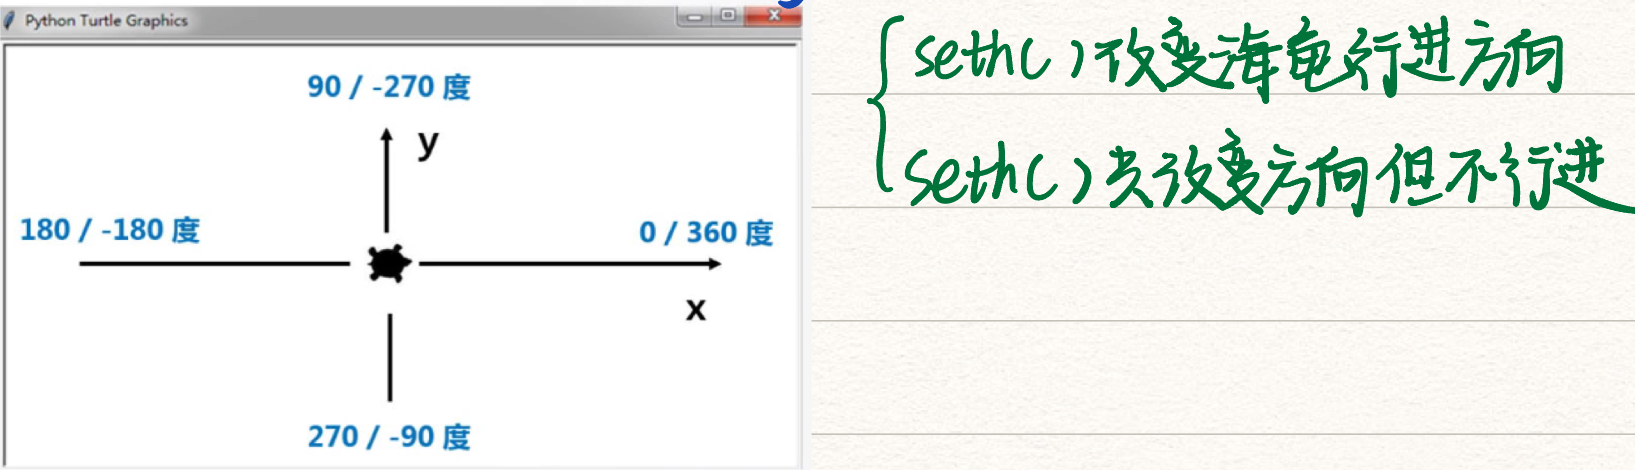
海龟角度:
turtle.left(angle)turtle.right(angle)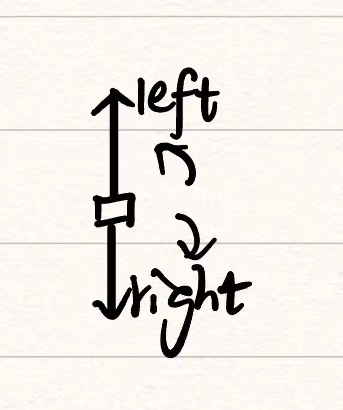
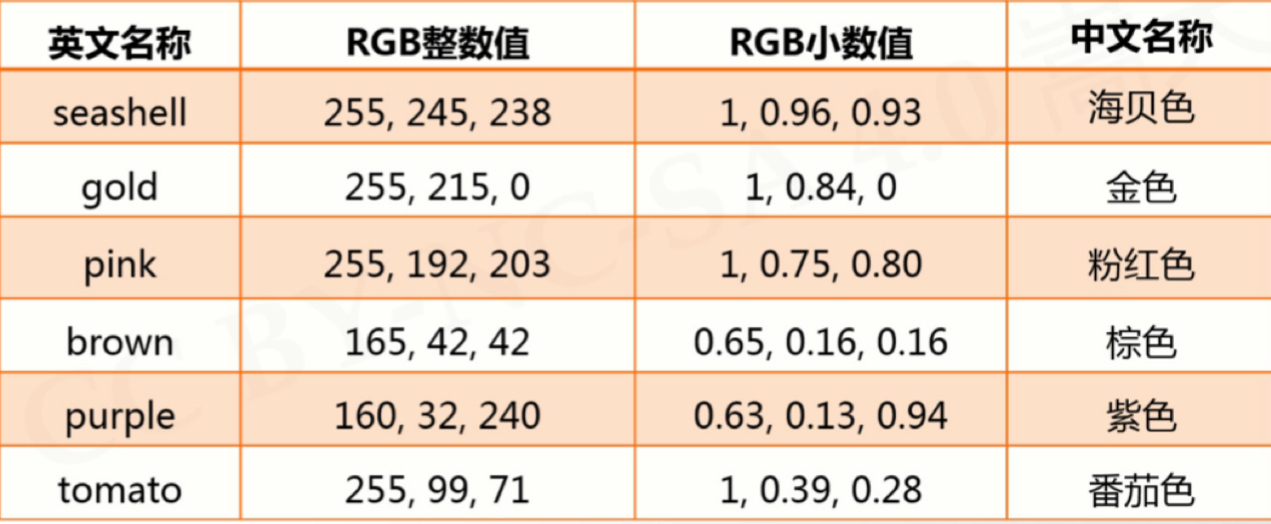
4.Turtle的RGB色彩模式
turtle.colormode(mode)默认采用小数值,可切换为整数值:
- mode=1.0:RGB小数值模式
- mode=255:RGB整数值模式
常用RGB色彩:
5.画笔控制函数
turtle.penup()#将画笔抬起turtle.pendown()#将画笔落下turtle.pensize(width)turtle.pencolor(color)
6.简单示例:爱心绘制
1 | import turtle as t |
Time库
time库是Python中处理时间的标准库,能够获取系统时间并格式化输出功能,并提供系统级精确计时功能,用于程序性能分析。
1.时间获取
time()ctime()gmtime()1
2
3
4
5
6
7
8
9
10
11import time
#获取当前时间戳,即计算机内部时间值,浮点数
t1=time.time()
#获取当前时间并以易读的方式表示,返回字符串
t2=time.ctime()
#获取当时间时间,表示为计算机可处理的时间格式
t3=time.gmtime()
print("运行结果:")
print(t1)
print(t2)
print(t3)
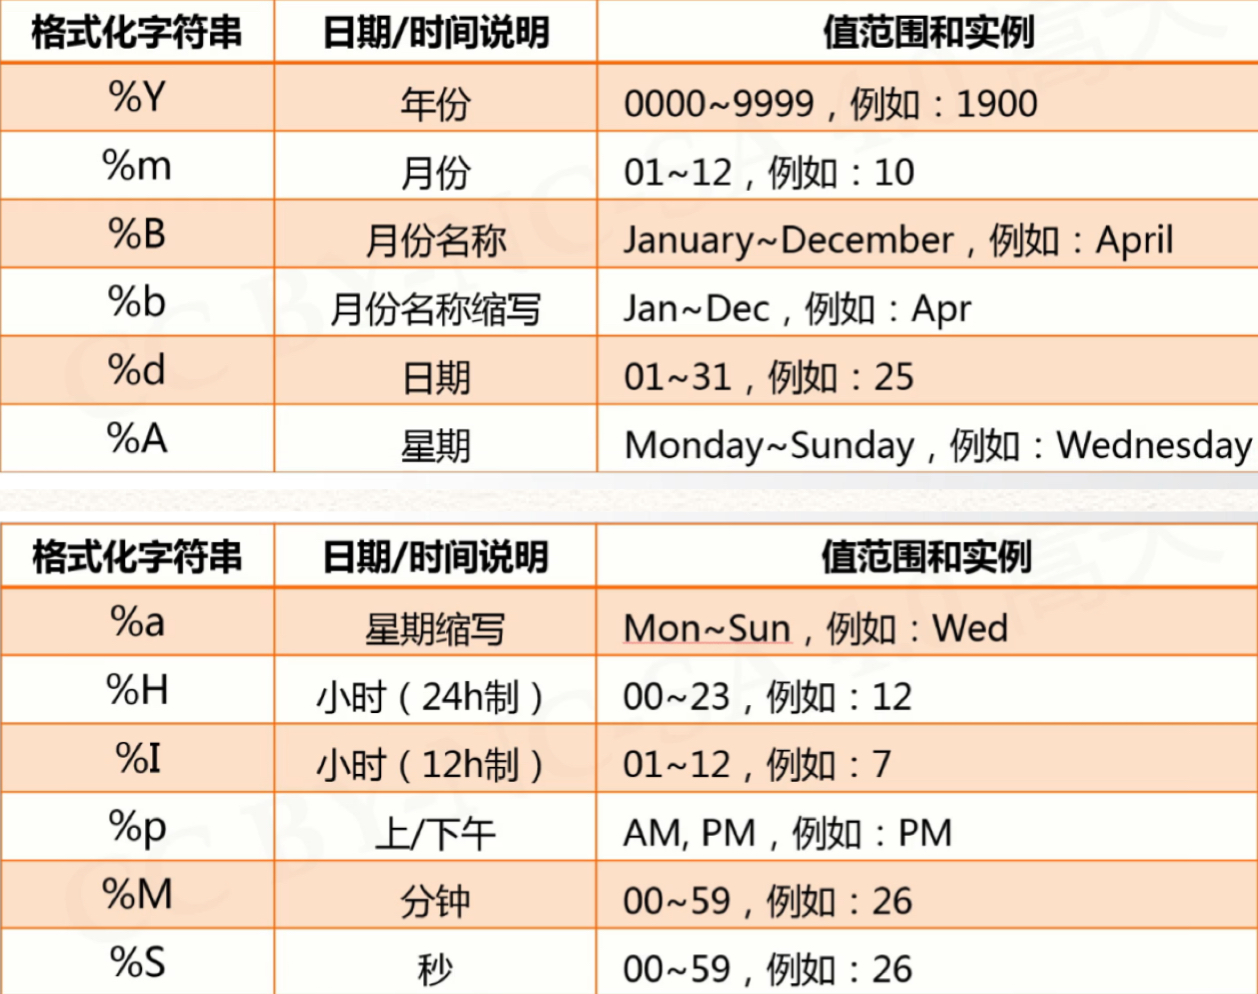
2.时间格式化
strftime(tpl,ts)其中tpl是格式化模板字符串,用来定义输出效果,ts是计算机内部时间类型变量
格式化字符串:
1
2
3
4import time
t=time.gmtime()
s=time.strftime("%Y-%m-%d %H:%M:%S",t)
print("运行结果:",s)
3.程序计时
perf_counter()#返回一个CPU级别的精确时间计算值,单位为秒sleep(s)#s是休眠时间,单位是秒,可以是浮点数1
2
3
4
5import time
start=time.perf_counter()
time.sleep(10)
end=time.perf_counter()
print("运行结果:",end-start)
4.简单示例:文本进度条
1 | import time |
Random库
Random库Python中用于生成随机数的标准库。
1.基本随机函数
seed()#设置随机种子,初始化给定的随机数种子,默认为当前系统时间random()#生成一个[0.0,1.0)之间的随机小数
2.扩展随机数函数
randint(a,b)#生成一个[a,b]之间的整数randrange(m,n[,k])#生成一个[m,n)之间以k为步长的随机整数getrandbits(k)#生成一个k比特长的随机整数uniform(a,b)#生成一个[a,b]之间的随机小数choice(seq)#从序列seq中随机选择一个元素shuffle(seq)#将序列seq中元素随机排列,返回打乱后的序列
1 | import random as r |
3.简单示例:蒙特卡罗方法计算圆周率
1 | from random import random |
PyInstaller库
PyInstaller库是第三方库,故使用前需额外安装,其官网为:PyInstaller Manual — PyInstaller 5.6.1 documentation。其功能是将.py源代码转换成无需源代码的可执行文件。
简单使用:
(cmd命令行) pyinstaller -F <文件名.py>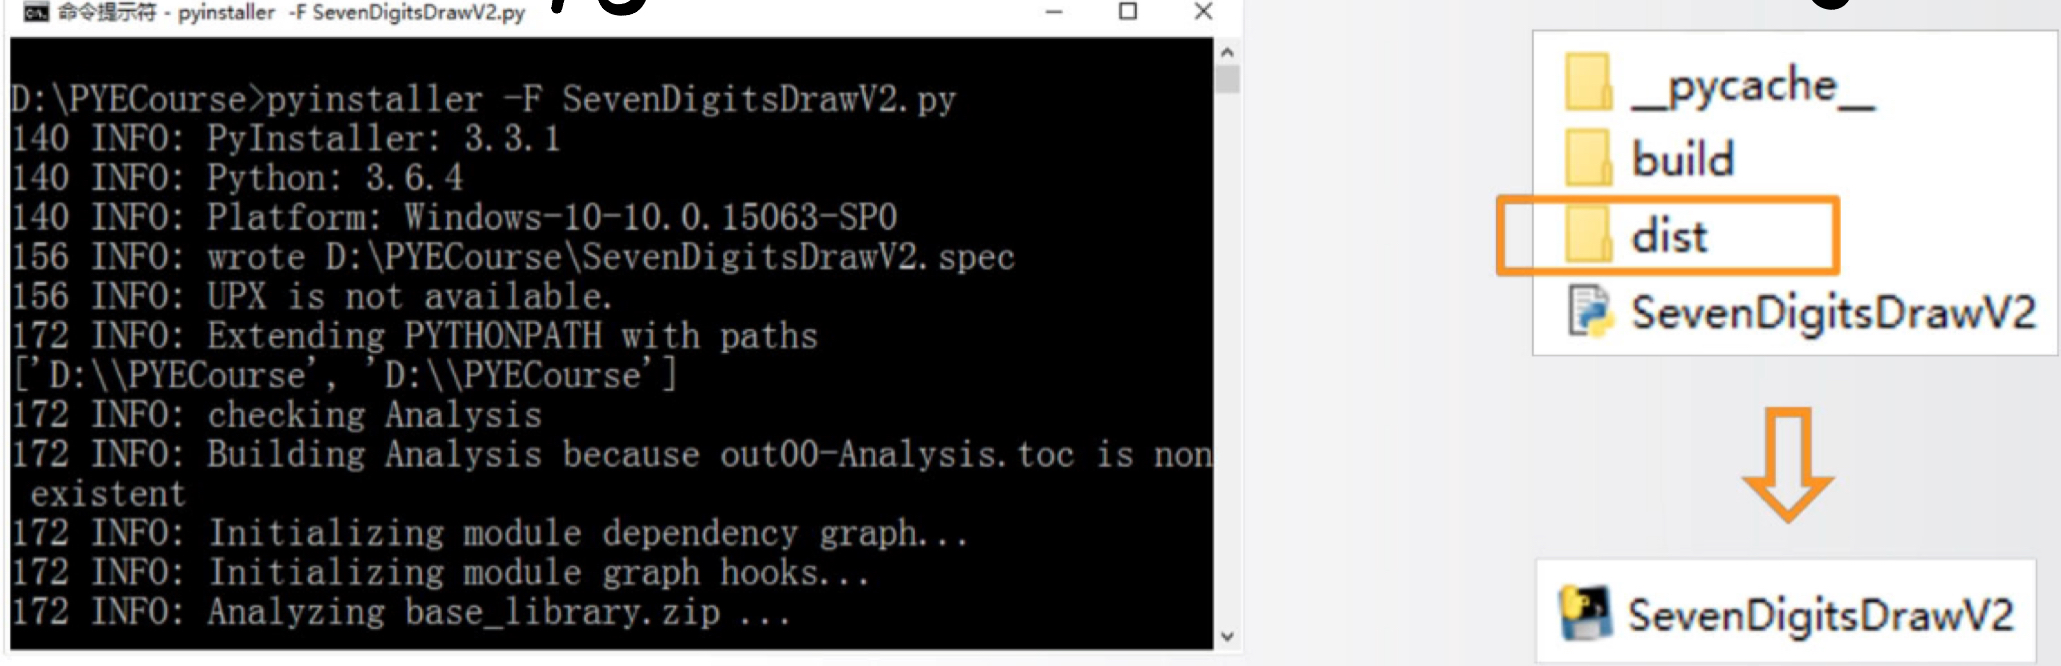
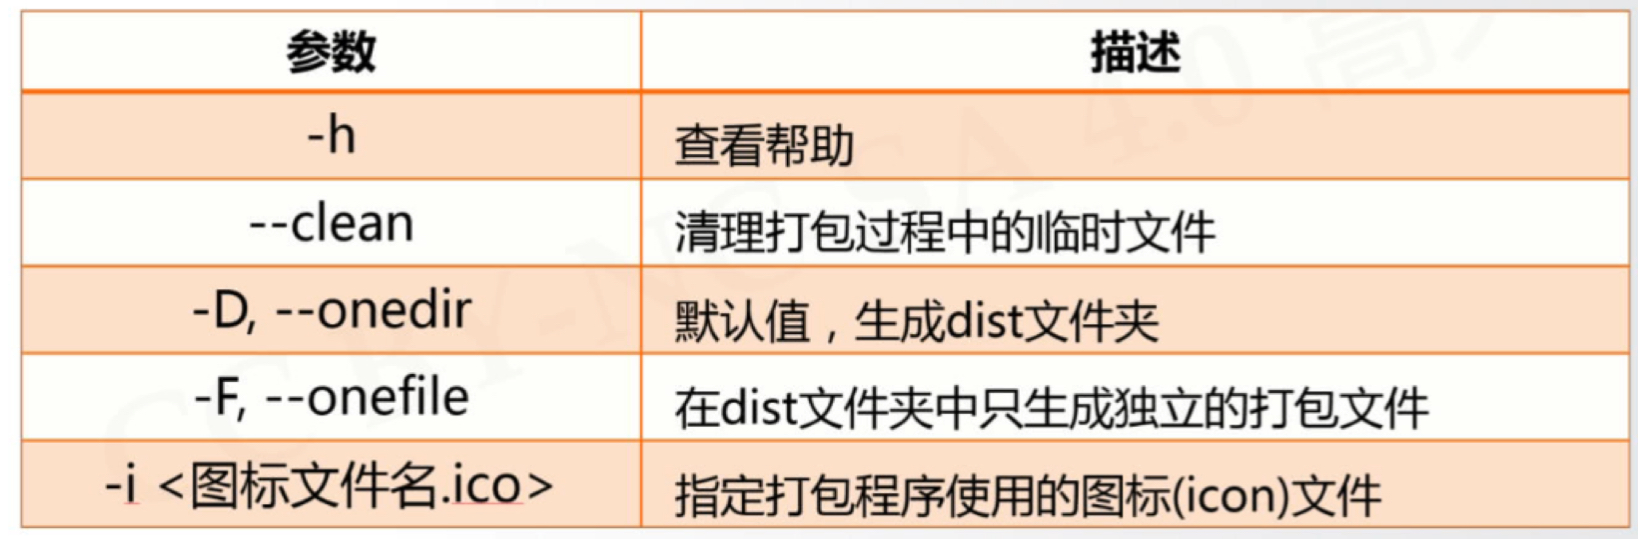
PyInstaller库常用参数:
jieba库
jieba是优秀的中文分词第三方库,需要额外安装。jieba利用一个中文词库,确定中文字符之间的关联概率,中文字符间概率大的组成词组,形成分词结果。
jieba.lcuts(s)#精确模式,返回一个列表类型的分词结果jieba.lcuts(s,cut_all=True)#全模式,返回一个列表类型的分词结果,存在冗余jieba.lcut_for_search(s)#搜索引擎模式,返回一个列表类型的分析结果,存在冗余jieba.add_word(w)#向分词词典增加新词w
1 | import jieba |

worldcloud库
worldcloud库是一个生成词云的第三方库。wordcloud.WordCloud()代表一个文本对应的词云,可以根据文本中词云出现的频率等参数绘制词云,词云的绘制形状、尺寸和颜色都可以设定。
1.常规使用方法
步骤1:配置对象参数
| 参数 | 描述 |
| ———————— | ——————————————————————————— |
| width | 指定词云对象生成图片的宽度,默认400像素 |
| height | 指定词云对象生成图片的高度,默认200像素 |
| min_font_size | 指定词云中字体的最小字号,默认4号 |
| max_font_size | 指定词云中字体的最大字号,根据高度自动调节 |
| font_step | 指定词云中字体字号的步进间隔,默认为1 |
| font_path | 指定字体文件的路径,默认None |
| max_words | 指定词云显示的最大单词数量,默认200 |
| stop_words | 指定词云的排除词列表,即不显示的单词列表 |
| mask | 指定词云形状,默认为长方形,若更改需要引用imread()函数 |
| background_color | 指定词云图片的背景颜色,默认为黑色 |步骤2:加载词云文本
w.generate(txt)#向WordCloud对象w中加载文本txt
步骤3:输出词云文件
w.to_file(filename)#将词云输出为图像文件,.png或.jpg格式
1
2
3
4
5
6
7
8
9
10
11
12
13import wordcloud
#配置对象参数
w=wordcloud.WordCloud(width=500,height=300,font_path="msyh.ttc",min_font_size=2,max_words=20)
'''
#mask的使用示例:
from scipy.misc import imread
mk=imread("pic.png")
w=wordcloud.WordCloud(mask=mk)
'''
#加载词云文本
w.generate("The wordcloud by Python,hello world")
#输出词云文本
w.to_file("pywordcloud.png")结果如下:

2.简单示例:生成中文词云
1 | #导入库 |
结果如下:

Pillow库
1 | from PIL import Image, ImageFilter |